Login with your credentials and follow the instruction.
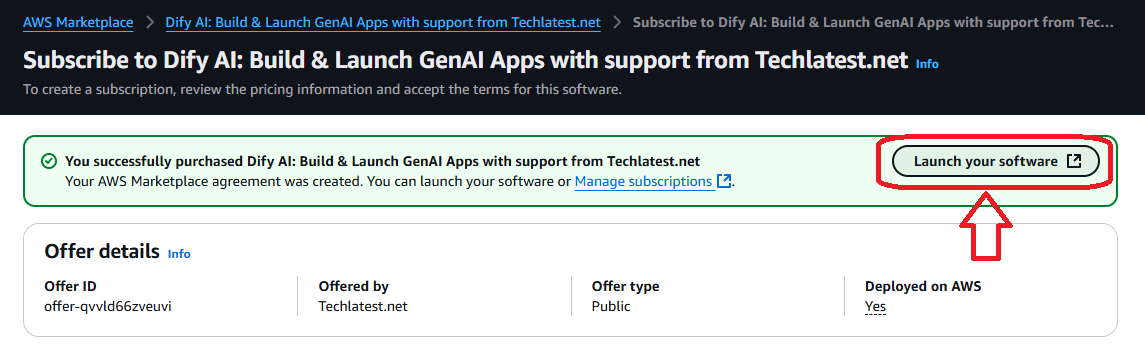
Review the prices and subscribe to the product by clicking on subscribe button on this page. Once you are subscribed to the offer, click on Launch your software button.
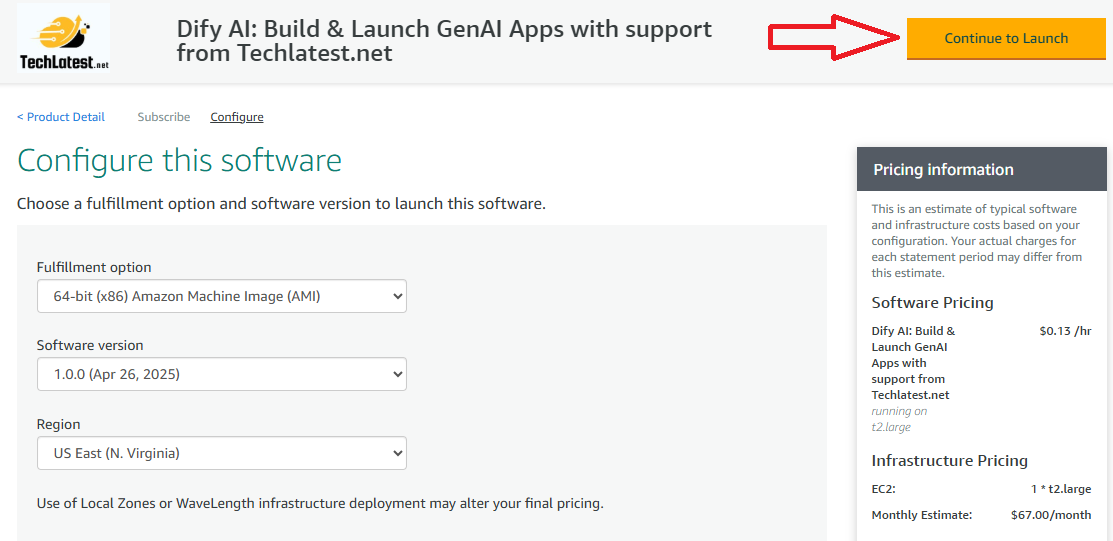
Select a Region where you want to launch the VM(such as US East (N.Virginia))
Click on Continue to Launch Button.
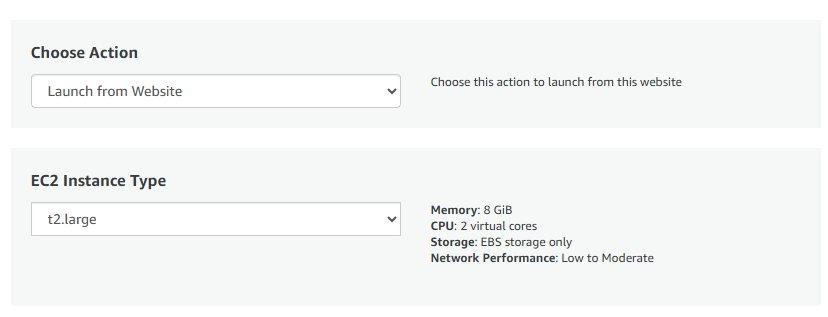
Choose Action: You can launch it through EC2 or from Website.(Let’s choose Launch from website)
Optionally change the EC2 instance type. (This defaults to t2.large instance type, 2 vCPUs and 8 GB RAM.)
Minimum VM Specs : 8GB Memory /2vCPU
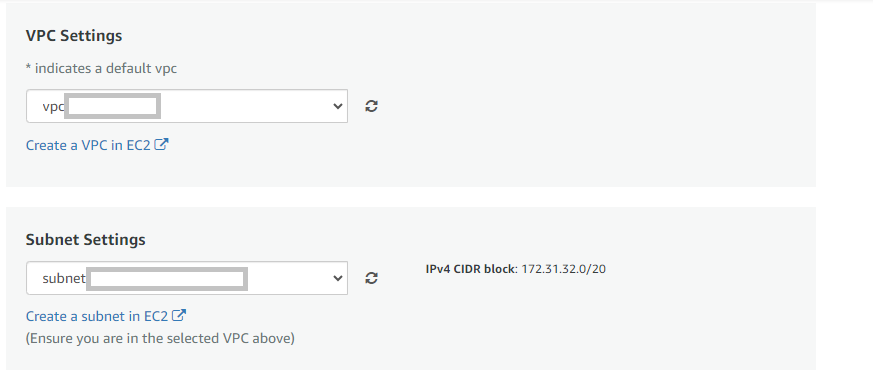
Optionally change the network name and subnetwork names.
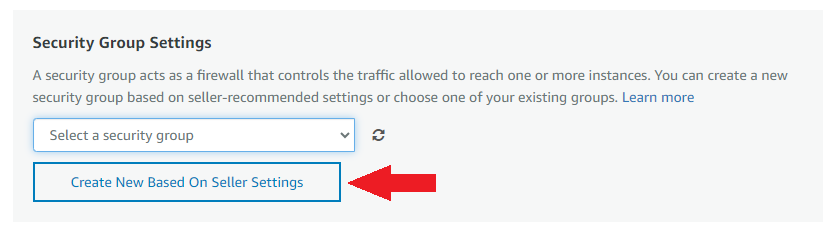
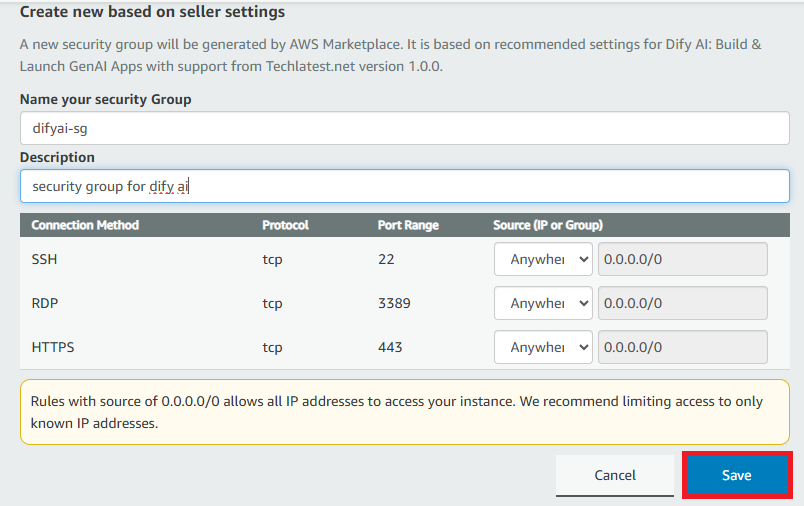
Select the Security Group. Be sure that whichever Security Group you specify have ports 22 (for SSH), 3389 (for RDP) and 443 (for HTTPS) exposed. Or you can create the new SG by clicking on “Create New Based On Seller Settings” button. Provide the name and description and save the SG for this instance.
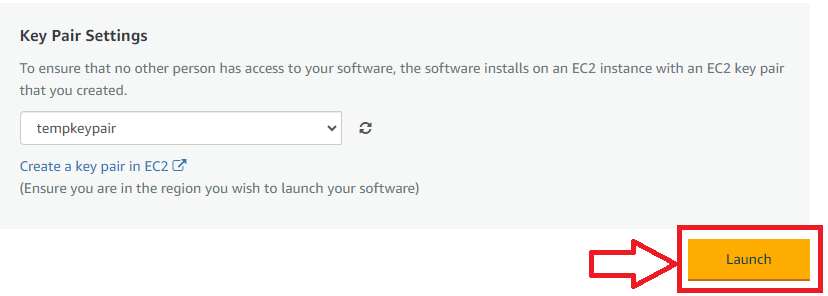
Be sure to download the key-pair which is available by default, or you can create the new key-pair and download it.
Click on Launch..
Dify AI: Build & Launch GenAI Apps will begin deploying.
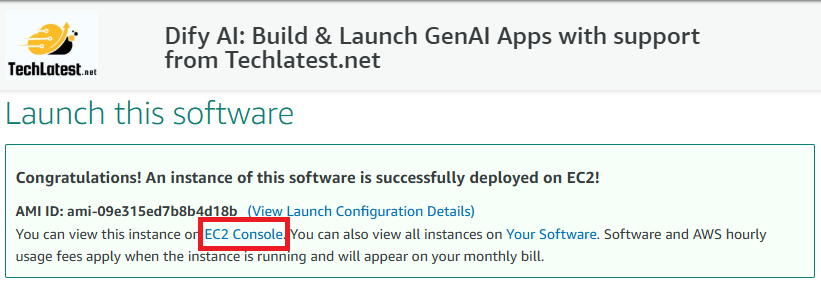
A summary page displays. To see this instance on EC2 Console click on EC2 Console link.
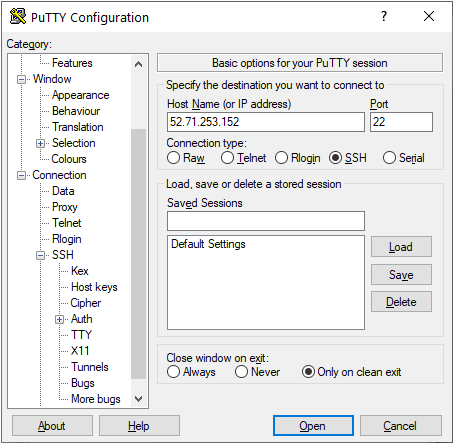
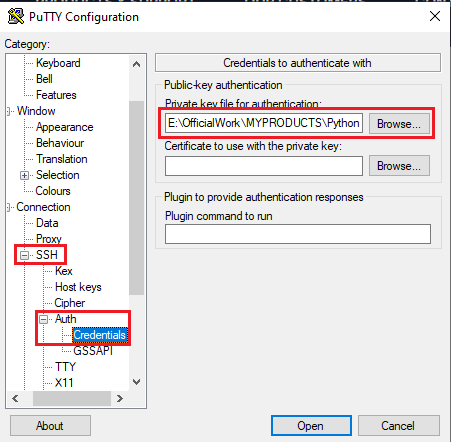
To connect to this instance through putty, copy the IPv4 Public IP Address from the VM’s details page.
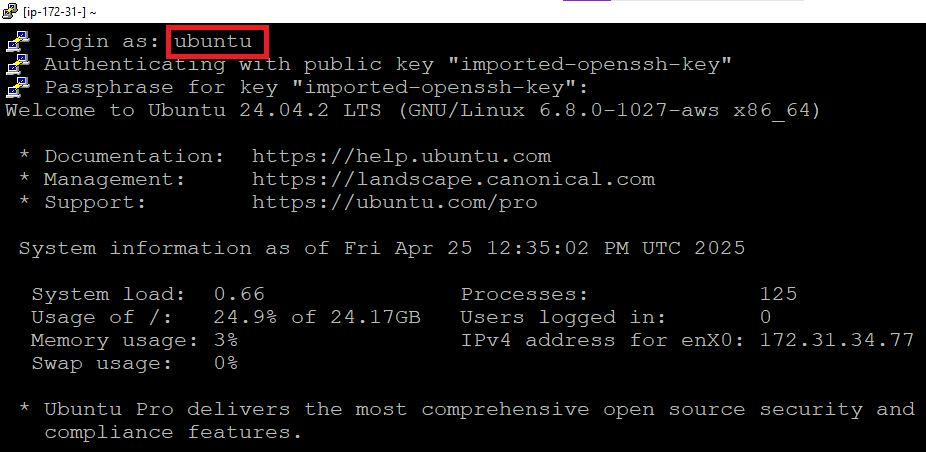
Open putty, paste the IP address and browse your private key you downloaded while deploying the VM, by going to SSH->Auth->Credentials, click on Open. Enter ubuntu as userid
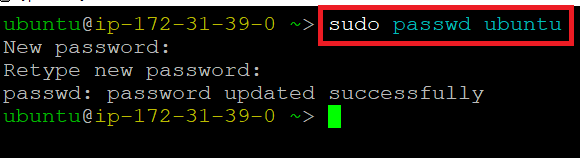
Once connected, change the password for ubuntu user using below command
sudo passwd ubuntu
Now the password for ubuntu user is set, you can connect to the VM’s desktop environment from any local Windows Machine using RDP protocol or Linux Machine using Remmina.
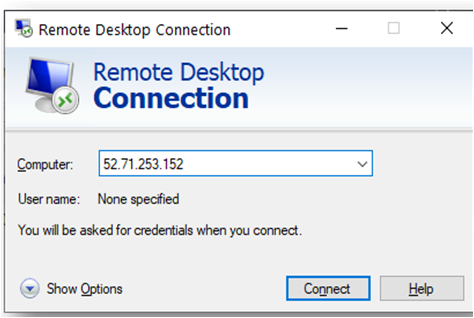
From your local windows machine, goto “start” menu, in the search box type and select “Remote desktop connection”. In the “Remote Desktop connection” wizard, copy the public IP address and click connect
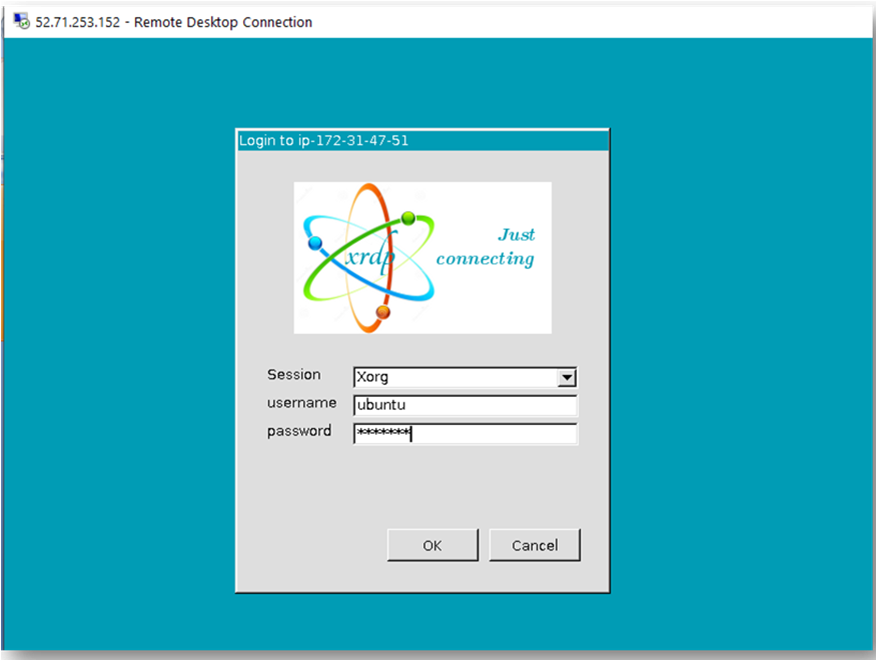
This will connect you to the VM’s desktop environment. Provide the username “ubuntu” and the password set in the above “Reset password” step to authenticate. Click OK
Now you are connected to the out of box Dify AI: Build & Launch GenAI Apps VM’s desktop environment via Windows Machine.
To connect using RDP via Linux machine, first note the external IP of the VM from VM details page, then from your local Linux machine, goto menu, in the search box type and select “Remmina”.
Note: If you don’t have Remmina installed on your Linux machine, first Install Remmina as per your linux distribution.
In the “Remmina Remote Desktop Client” wizard, select the RDP option from dropdown and paste the external ip and click enter.
This will connect you to the VM’s desktop environment. Provide “ubuntu” as the userid and the password set in above reset password step to authenticate. Click OK
Now you are connected to out of box Dify AI: Build & Launch GenAI Apps VM’s desktop environment via Linux machine.
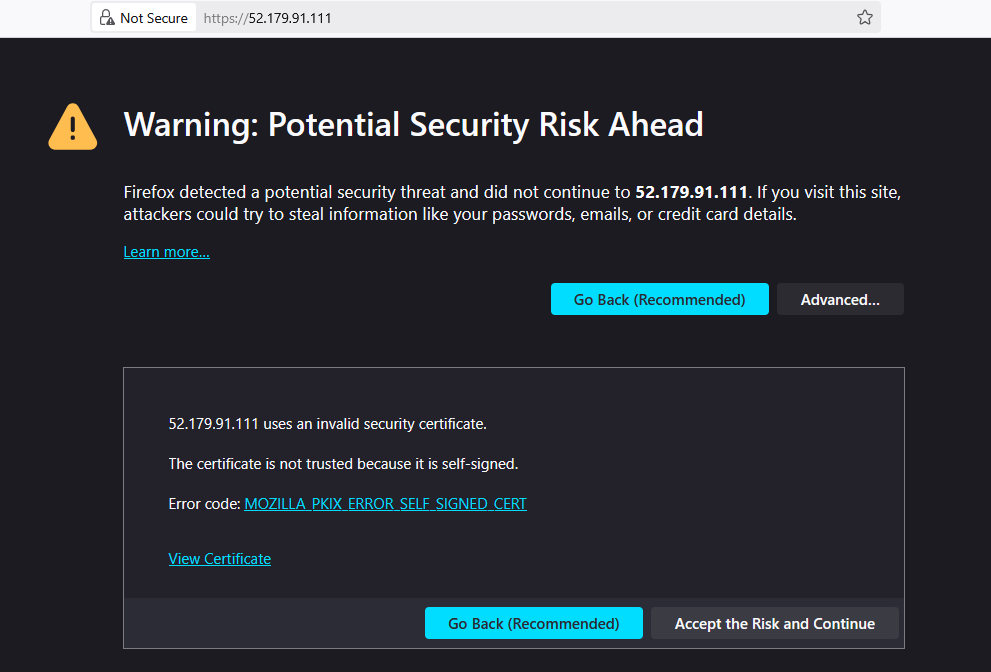
To access the DifyAI Web Interface, copy the public IP address of the VM and paste it in the browser as https://public_ip_of_vm. Make sure to use https in the URL:
Browser will display a SSL certificate warning message. Accept the certificate warning and Continue.
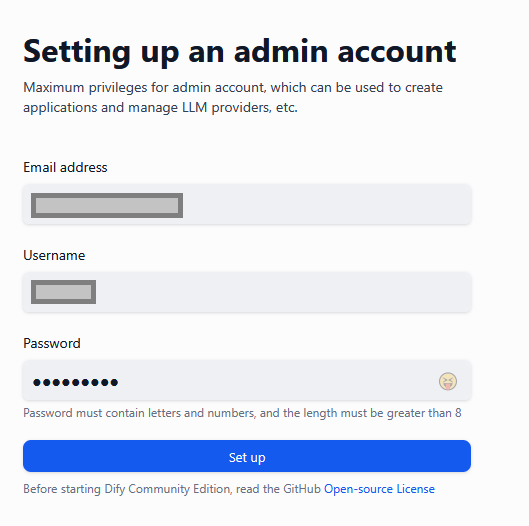
Provide the admin user details here and create your first admin account.
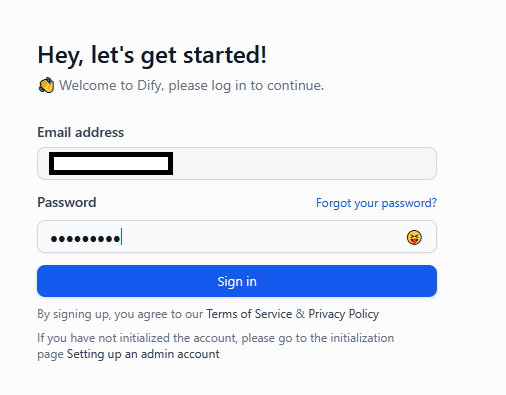
Relogin with your new admin account.
Now you are logged in to DifyAI Web Interface.
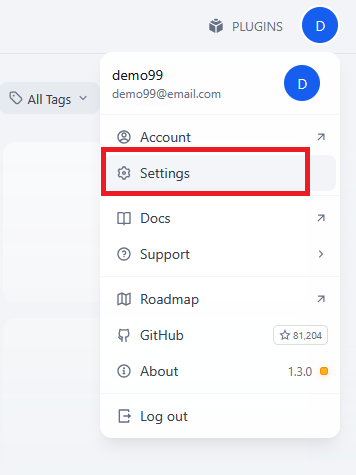
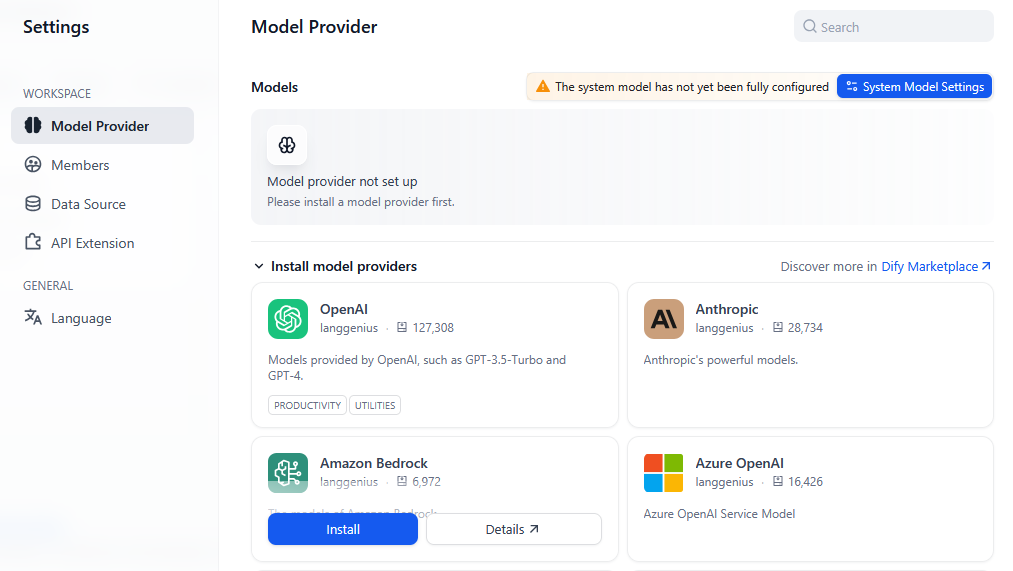
Dify is a development platform for AI application based on LLM Apps, when you are using Dify for the first time, you need to go to Settings —> Model Providers to add and configure the LLM you are going to use.
Dify supports major model providers like OpenAI’s GPT series and Anthropic’s Claude series. Each model’s capabilities and parameters differ, so select a model provider that suits your application’s needs. Obtain the API key from the model provider’s official website before using it in Dify.Read More
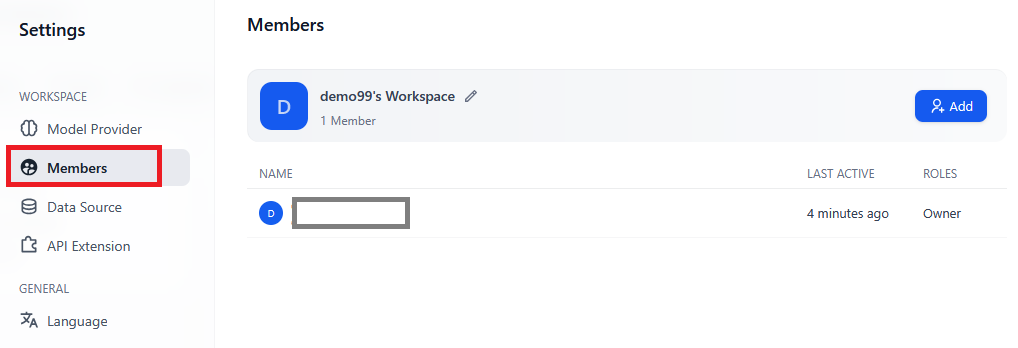
Under settings you will see different options like -
Members: allows you to add more members
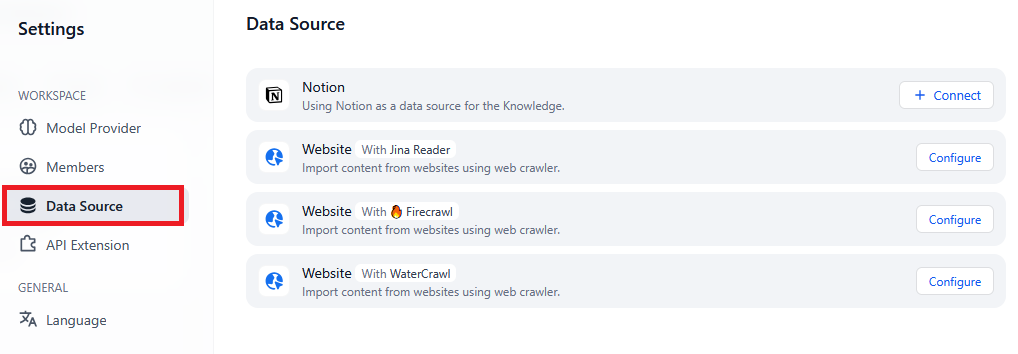
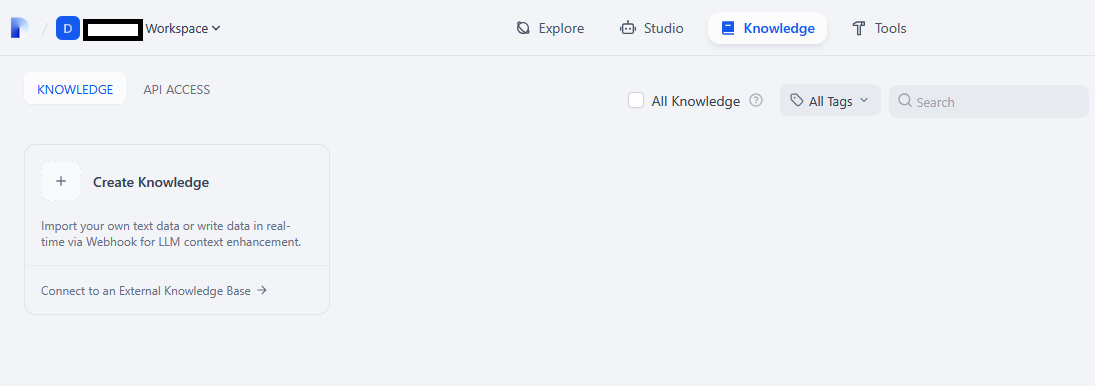
Data source: You can add different Data Sources from Data Source tab as shown in the screenshot.
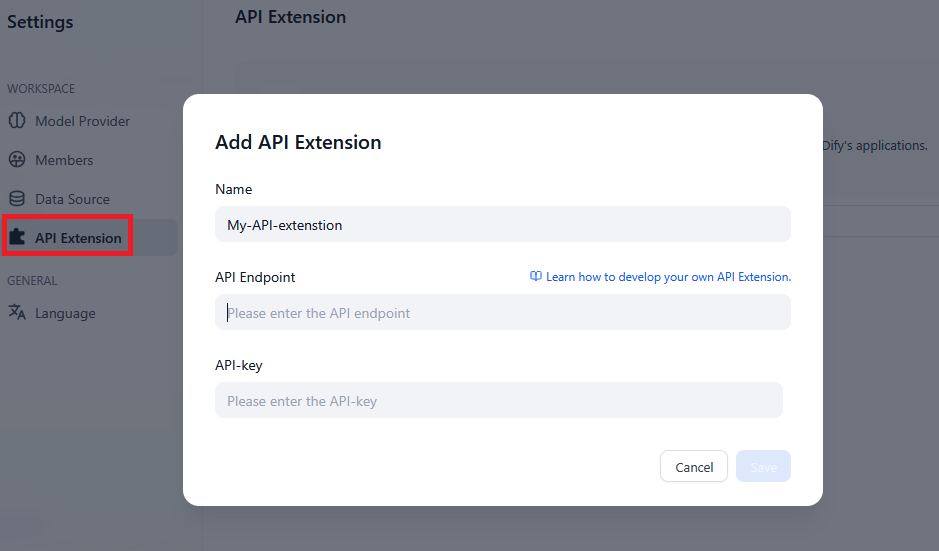
API extensions: The API-Based Extension in Dify AI empowers developers to augment and customize application functionalities by integrating external APIs and services.
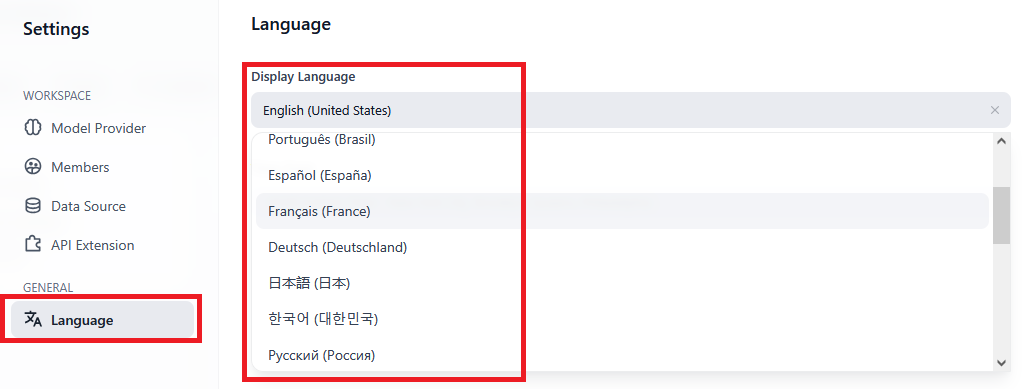
Language: Switch between different languages for your DifyAI UI from the language option given here.
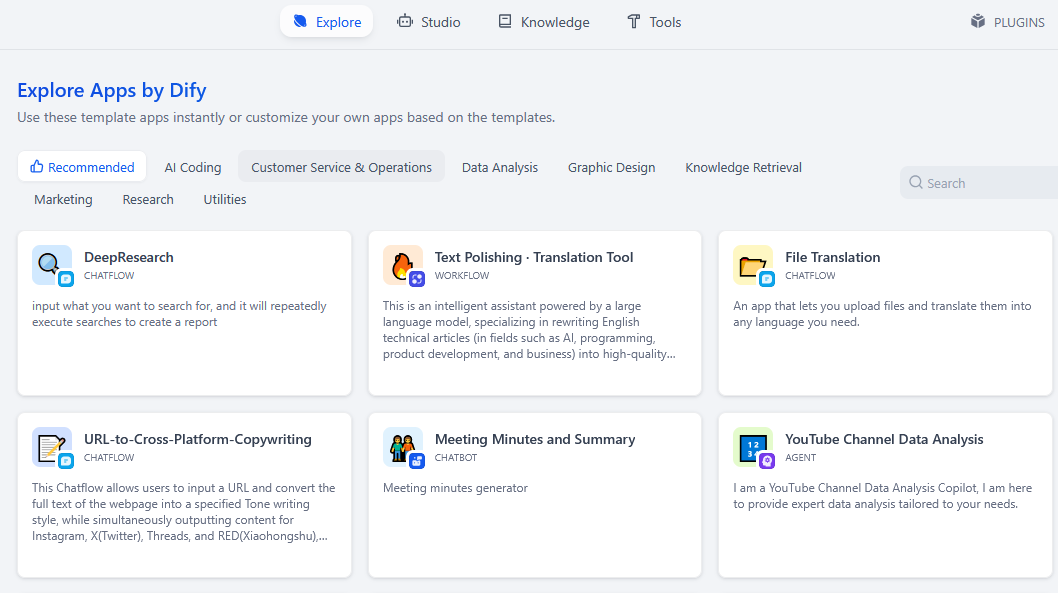
Explore:
The Explore tab in the Dify AI user interface is designed to help users discover and utilize pre-built AI application templates. These templates cover various domains such as human resources, assistants, translation, programming, and writing.
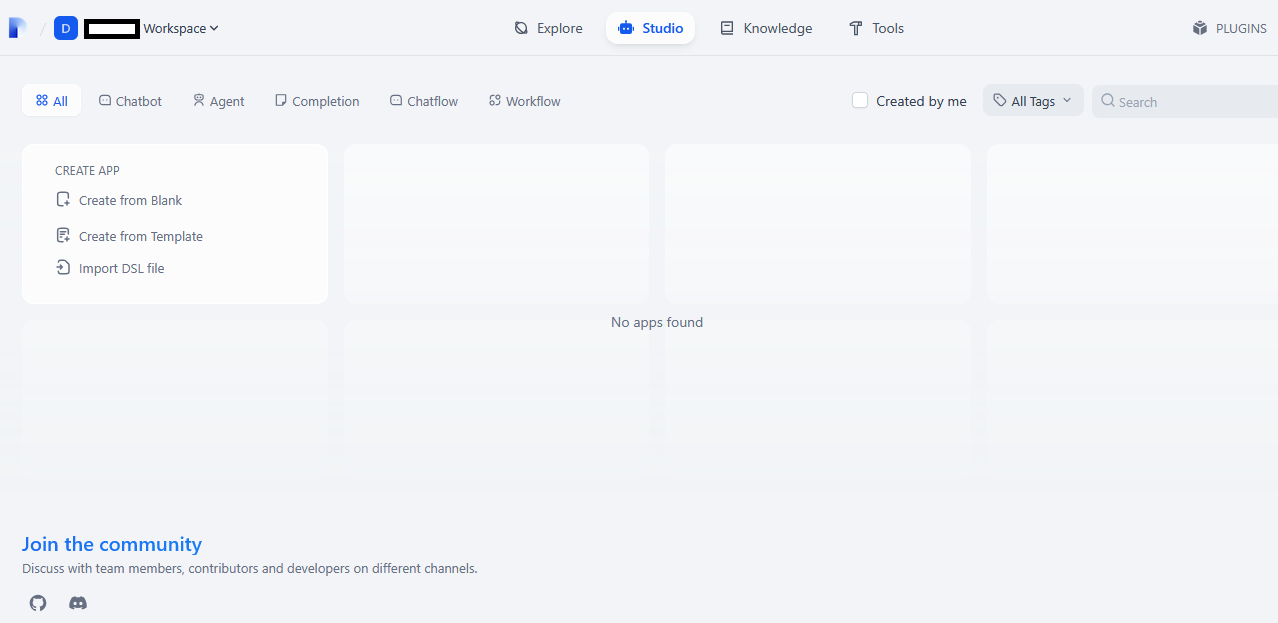
Studio:
The Studio tab in Dify AI serves as a comprehensive interface for developing, managing, and deploying AI applications powered by large language models (LLMs) like GPT. It integrates various tools and features to streamline the AI application development process.
Knowledge:
Dify’s Knowledge feature visualizes each stage of the RAG pipeline, providing a friendly UI for application builders to easily manage personal or team knowledge. It also allows for seamless integration into AI applications.
Developers can upload internal company documents, FAQs, and standard working guides, then process them into structured data that large language models (LLMs) can query. Read more
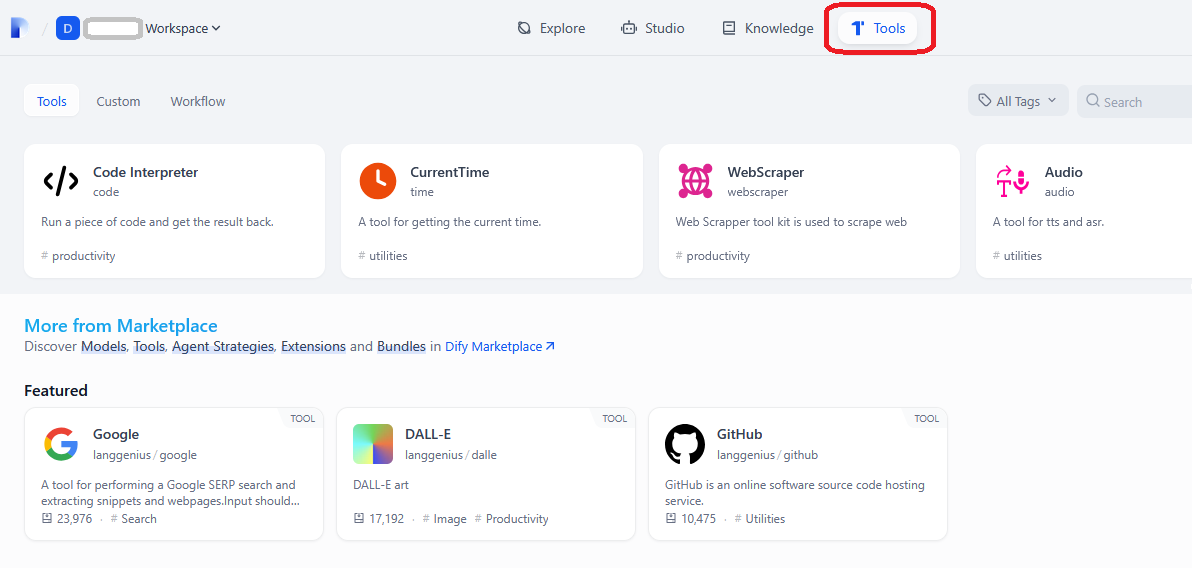
Tools:
The Tools tab in Dify AI is designed to extend the functionality of your AI applications by integrating external services and APIs. These tools can be utilized within Chatflow, Workflow, and Agent applications to perform specific tasks, such as web searches, data extraction, or image generation
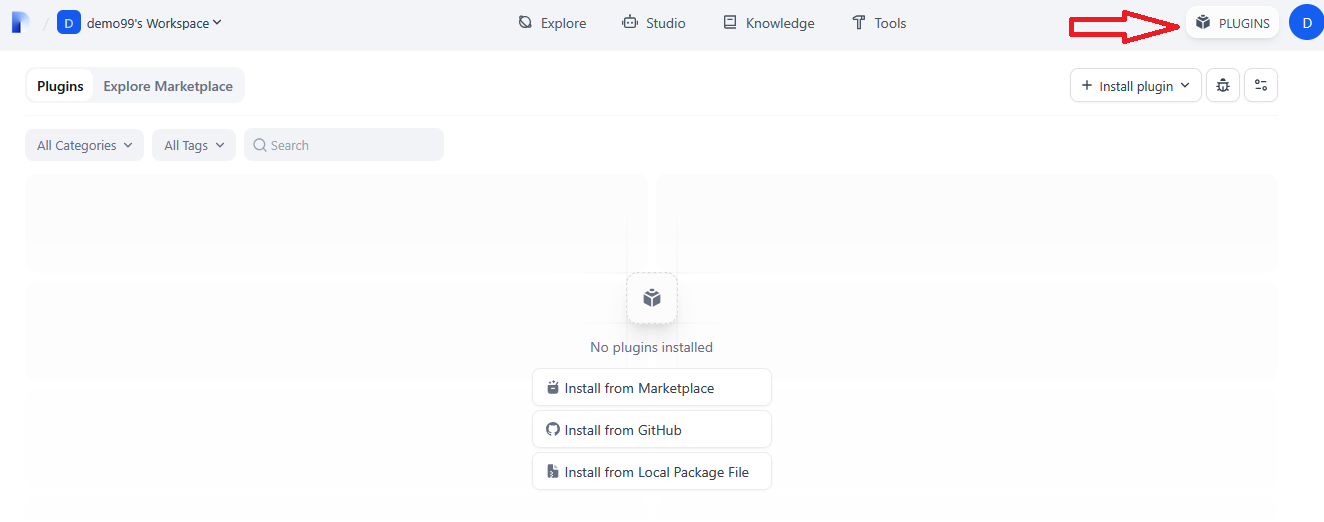
Plugins:
Plugin is a more developer-friendly and highly extensible third-party service extension module.
It contains five distinct plugin types, each designed to solve well-defined scenarios, giving developers limitless freedom to customize and enhance Dify applications.
Additionally, the plugin system is designed to be easily shared. You can distribute your plugins via the Dify Marketplace, GitHub, or as a Local file package. Read more