
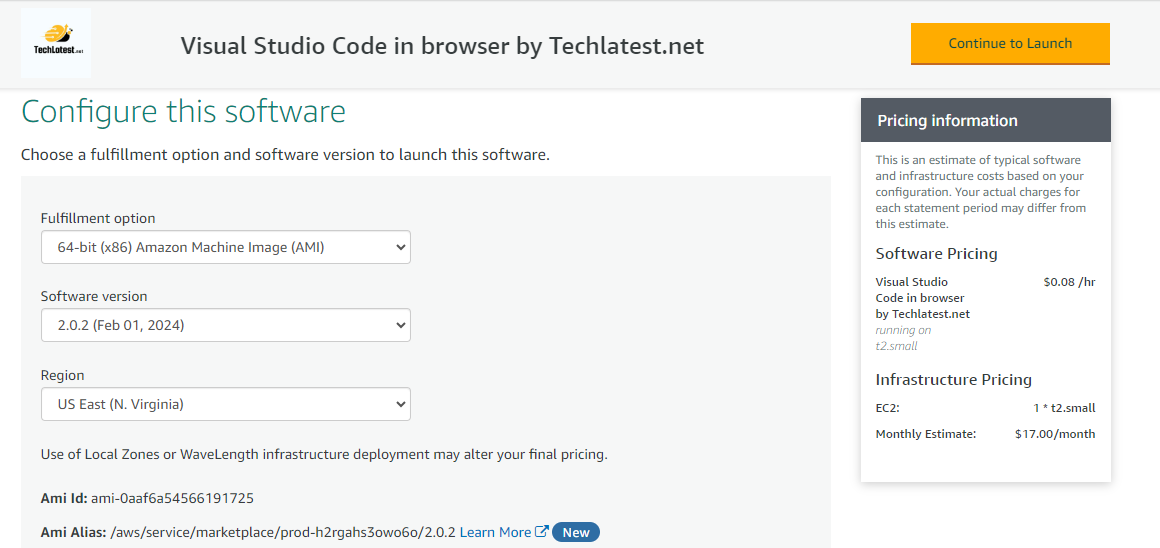
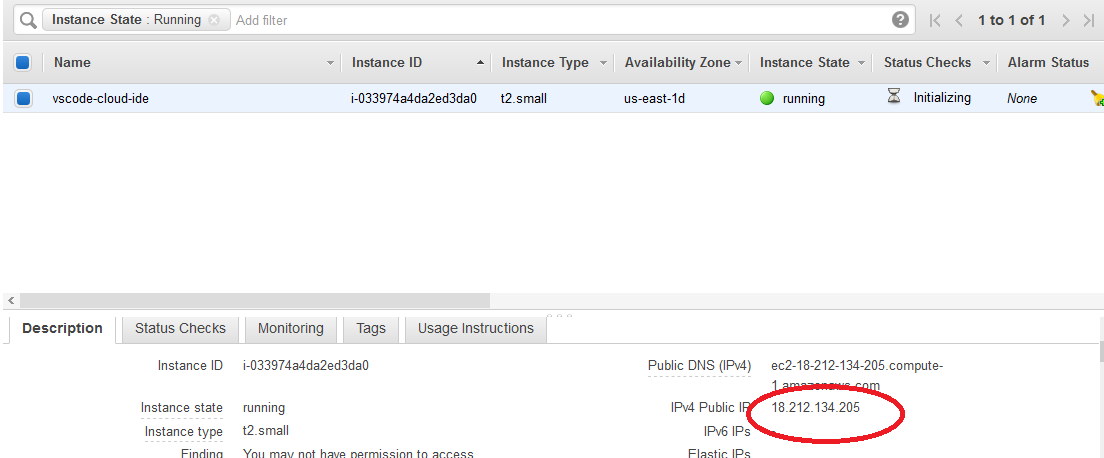
This section describes how to launch and connect to VSCode Cloud IDE in Amazon Web Services (AWS) with auto-generated(random) password. If you want to launch VSCode cloud IDE with User Provided Password go to - Launch VSCode Cloud IDE with User Provided Password
Note: Password once created Can Not be changed in either way of launching VM.

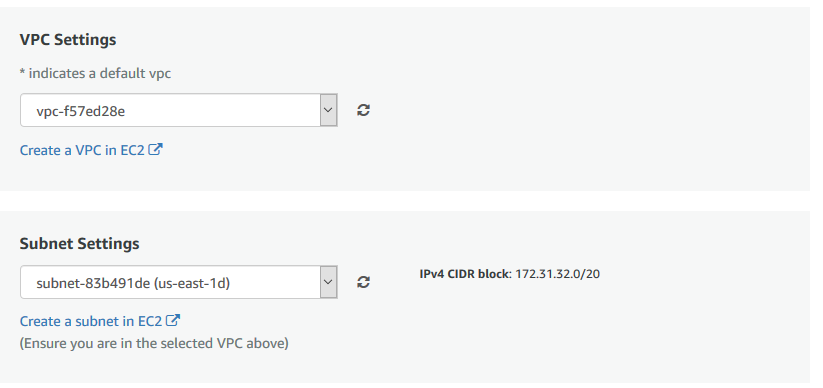
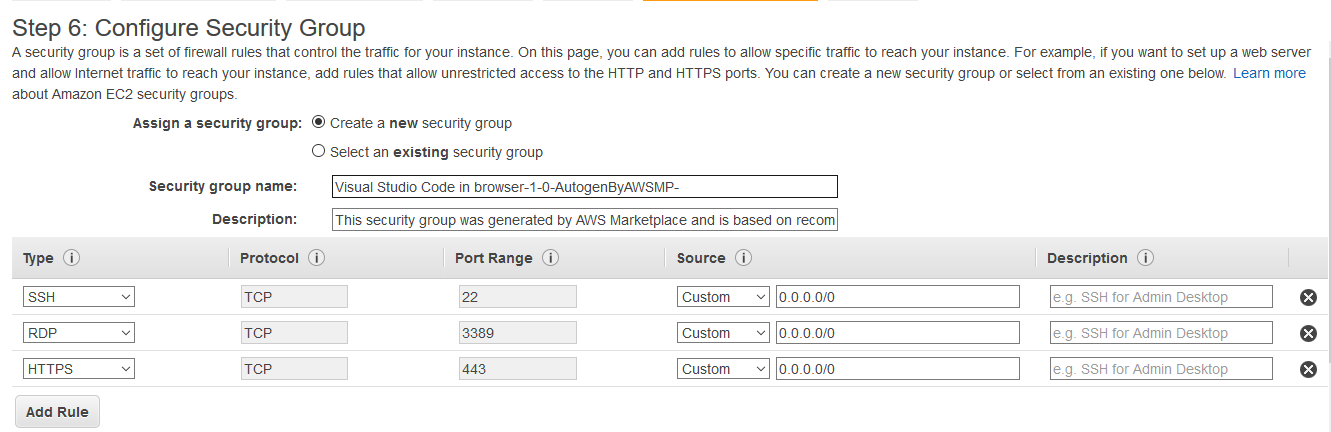
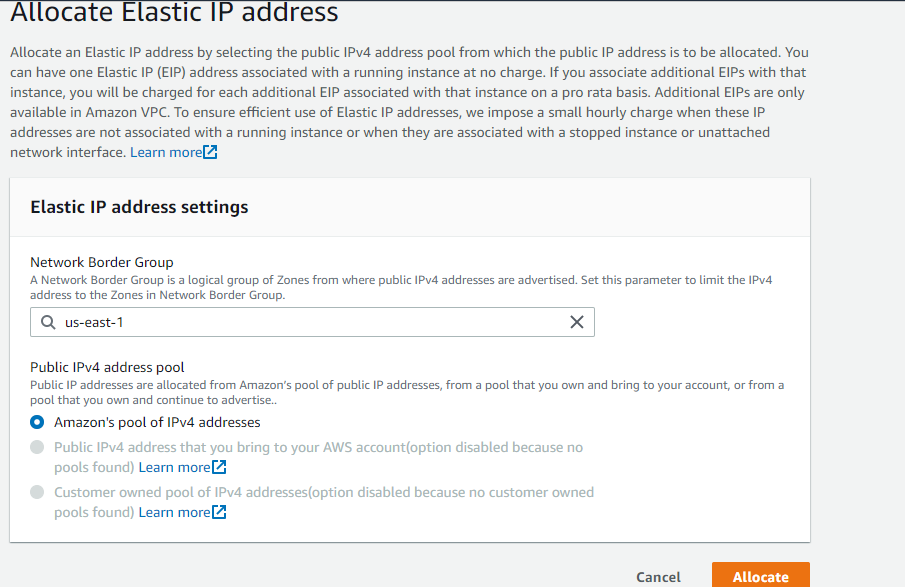
Select the Security Group. Be sure that whichever Security Group you specify have ports 22 (for ssh), 3389 (for RDP) and 443 (for HTTPS) exposed.
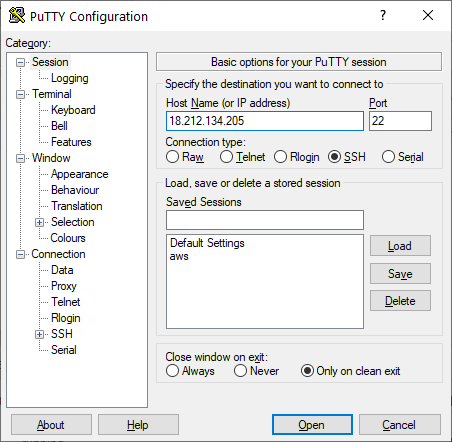
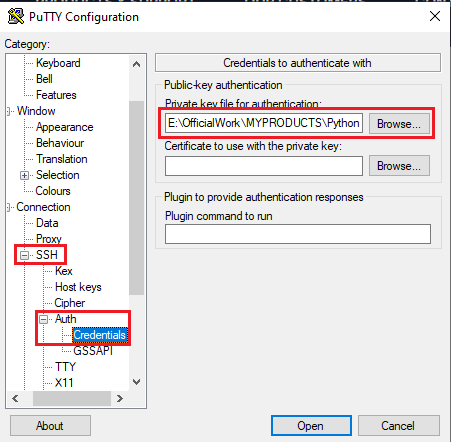
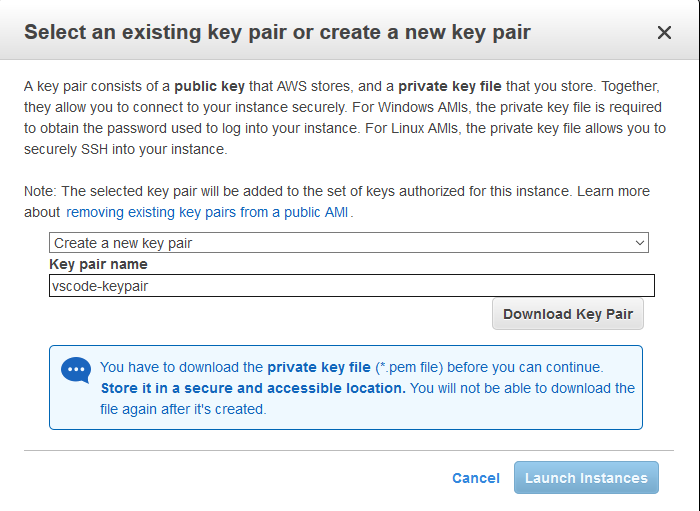
Be sure to download the key-pair which is available by default, or you can create the new key-pair and download it.

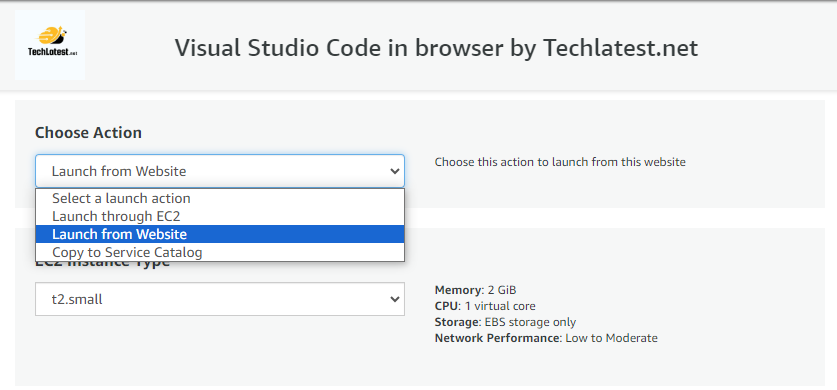
Click on Launch..
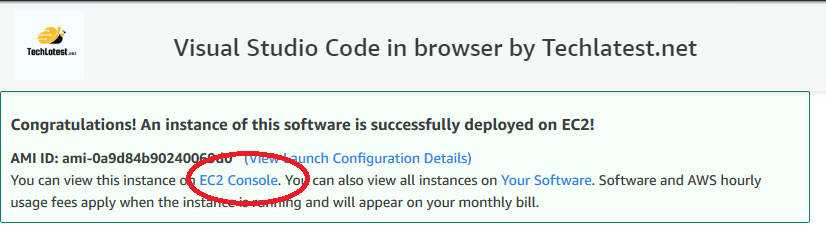
VSCode Cloud IDE will begin deploying.
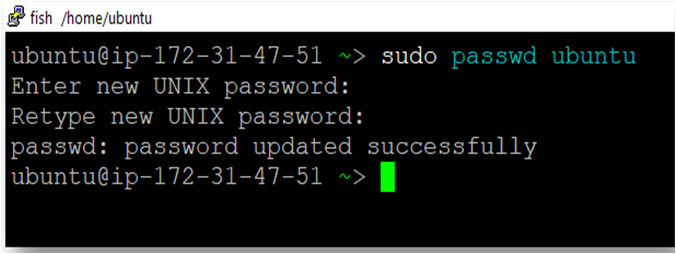
sudo passwd ubuntu
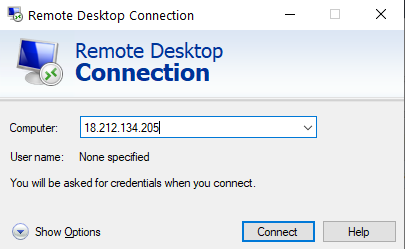
From your local windows machine, goto “start” menu, in the search box type and select “Remote desktop connection”. In the “Remote Desktop connection” wizard, copy the public IP address and click connect
Note: If you don’t have Remmina installed on your Linux machine, firstInstall Remmina as per your linux distribution.
 11. In the “Remmina Remote Desktop Client” wizard, select the RDP option from dropdown and paste the external ip and click enter.
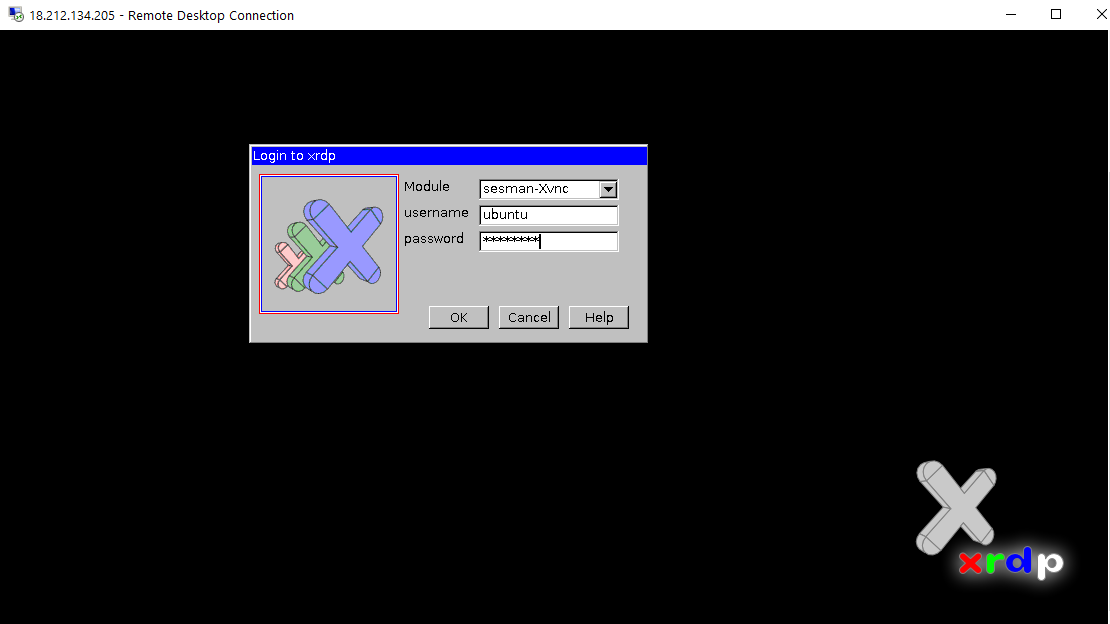
 12. This will connect you to the VM’s desktop environment. Provide “ubuntu” as the userid and the password set in above reset password step to authenticate. Click OK
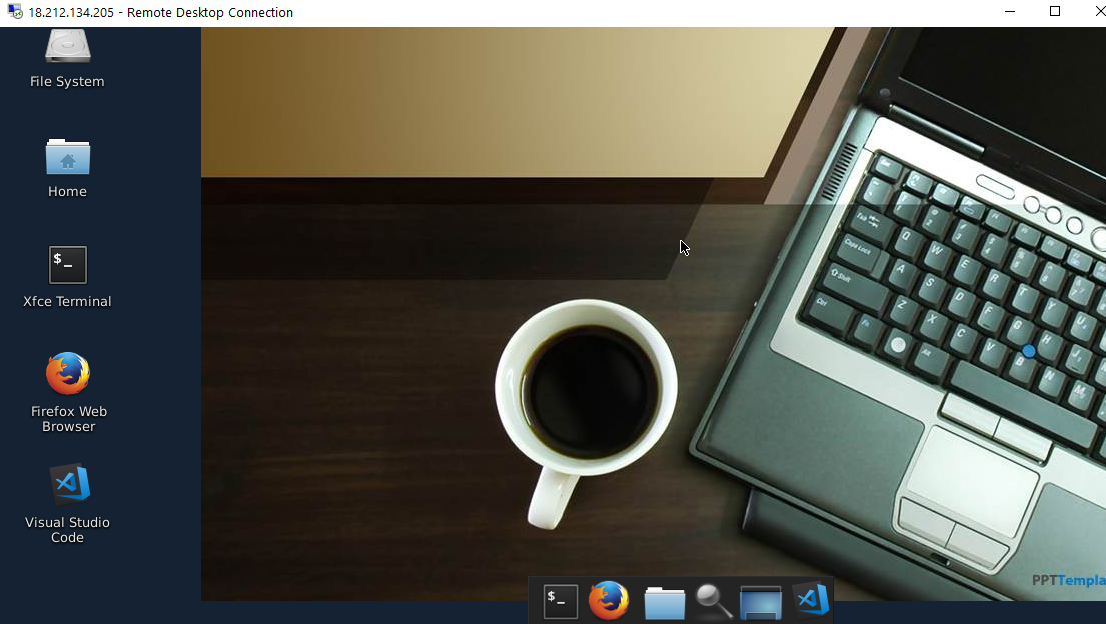
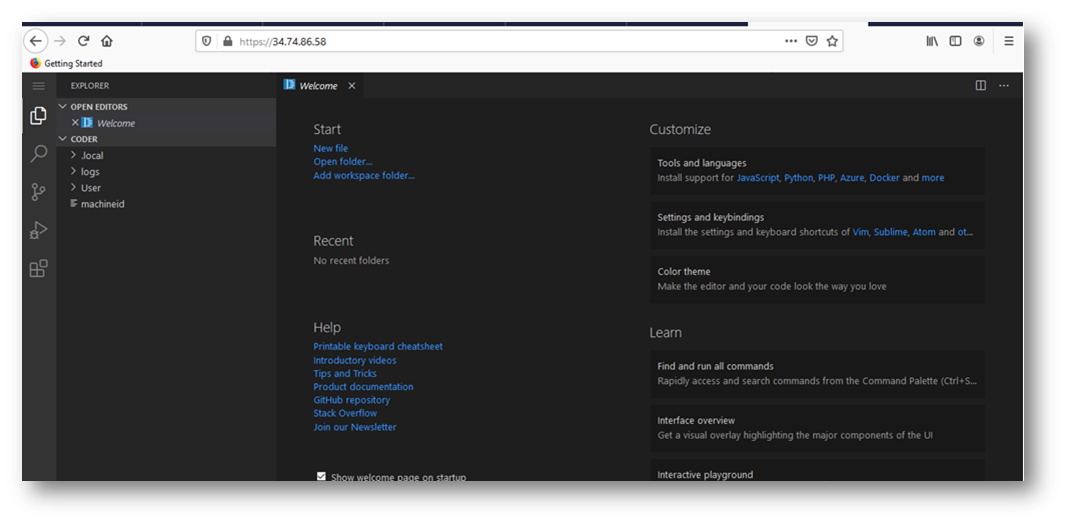
 13. Now you are connected to out of box VSCode Cloud IDE environment via Linux machine.
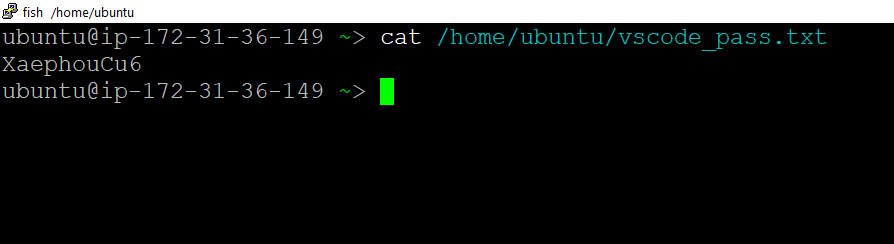
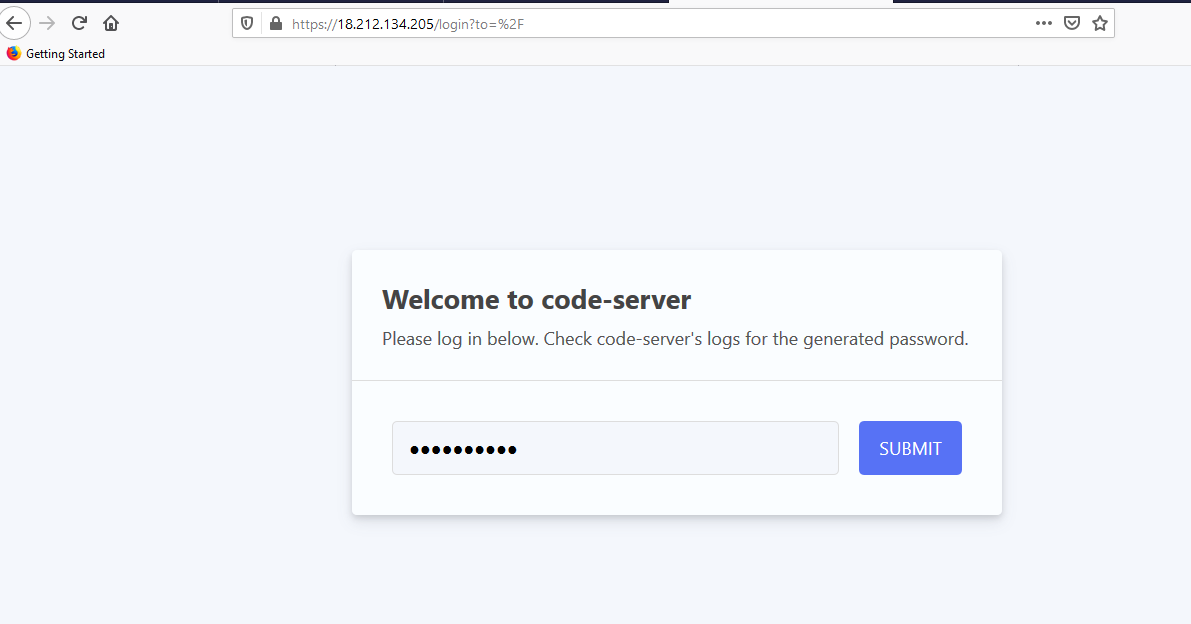
cat /home/ubuntu/vscode_pass.txt
Note down auto-generated password.
Note: If the password is empty in the file, wait for 2 minutes and check again.
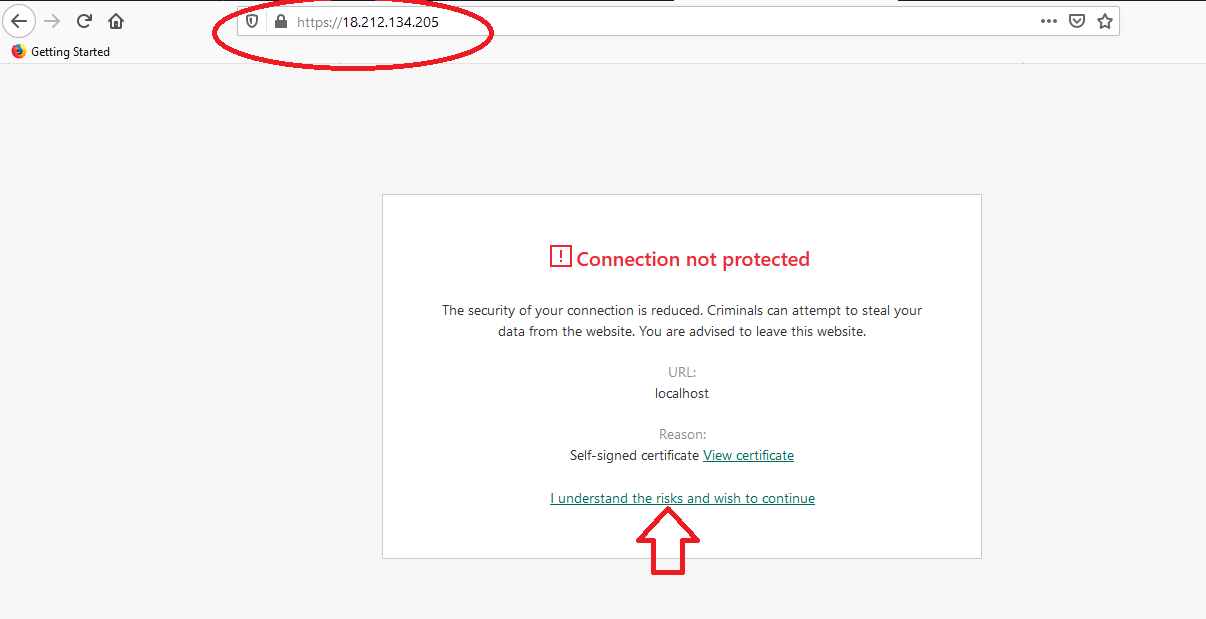
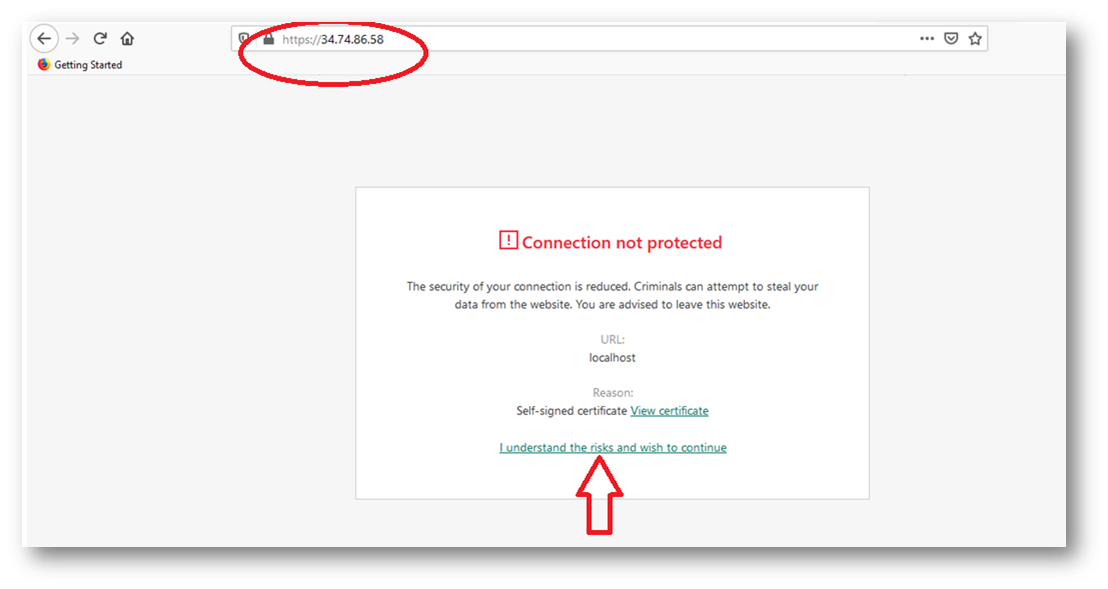
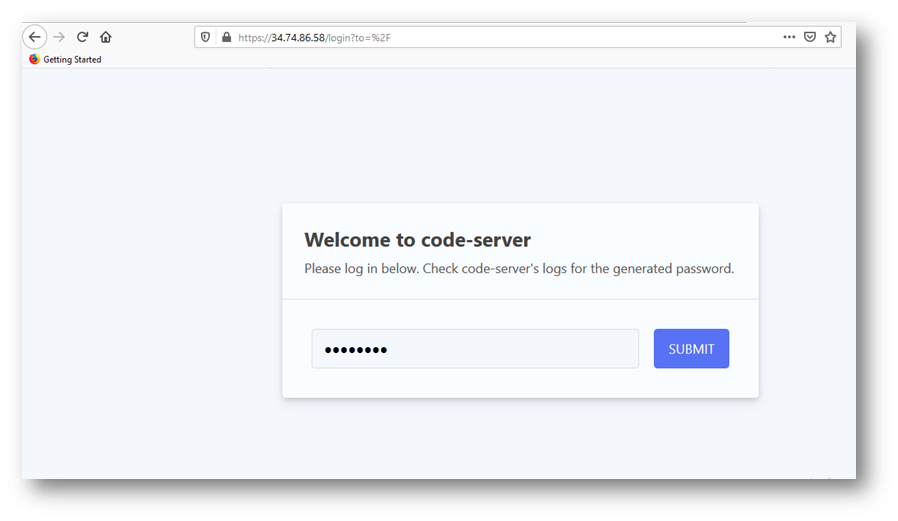
Go to https://VM_Public_IP. Make sure you type https and not http.
You will see certificate warning, accept the warning to proceed for login
Use above auto-generated password from Step 14
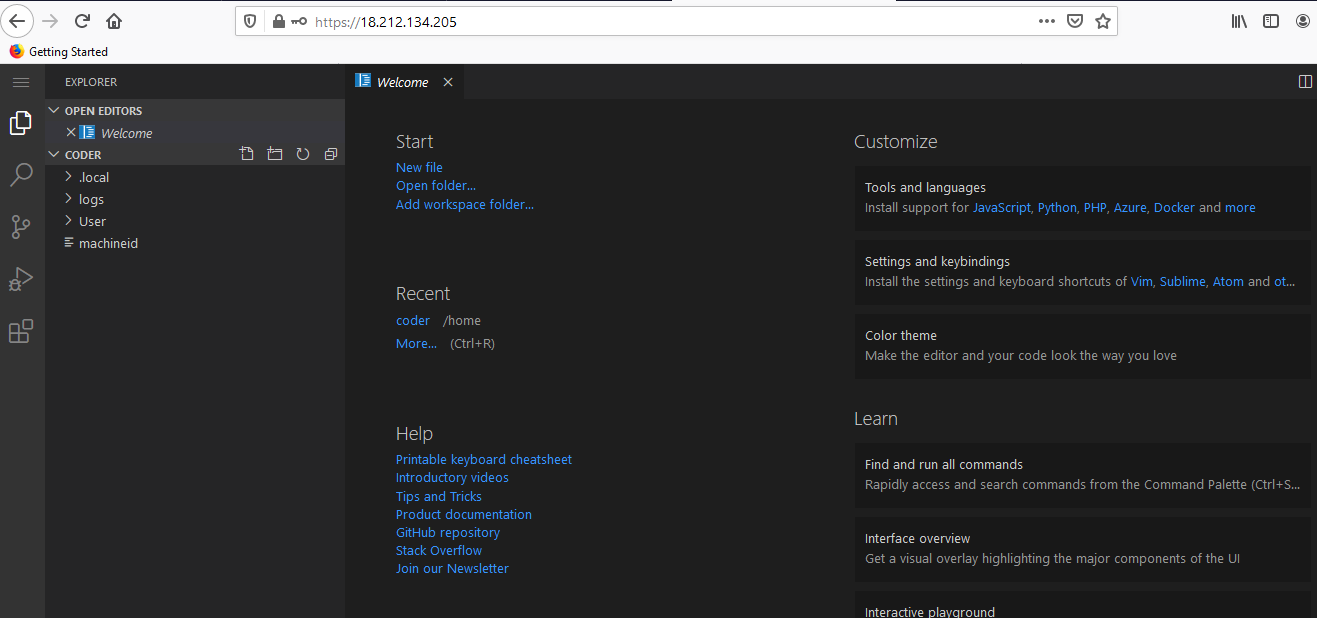
Note: If you happen to see a blank screen in the browser after login or page load error, wait for 1-2 minutes and open again in new browser window to see VSCode load.


Make sure you type https and not http. 4. You will see certificate warning, accept the warning to proceed for login
Note: If you happen to see a blank screen in the browser after login or page load error, wait for 1-2 minutes and open again in new browser window to see VSCode load.

The VM now comes with AI assistance plugins installed out of the box, leveraging open source AutoPilot alternatives, offering intelligent code suggestions, enhanced error detection, and personalized productivity enhancements.
Note: While accessing the extensions page of Code server on google chrome or on microsoft edge , if you encounter Error loading webview: Error: Could not register service worker: SecurityError: Failed to register a ServiceWorker error, then please access the code server in mozilla firefox browser.

Follow below steps to configure these plugins.
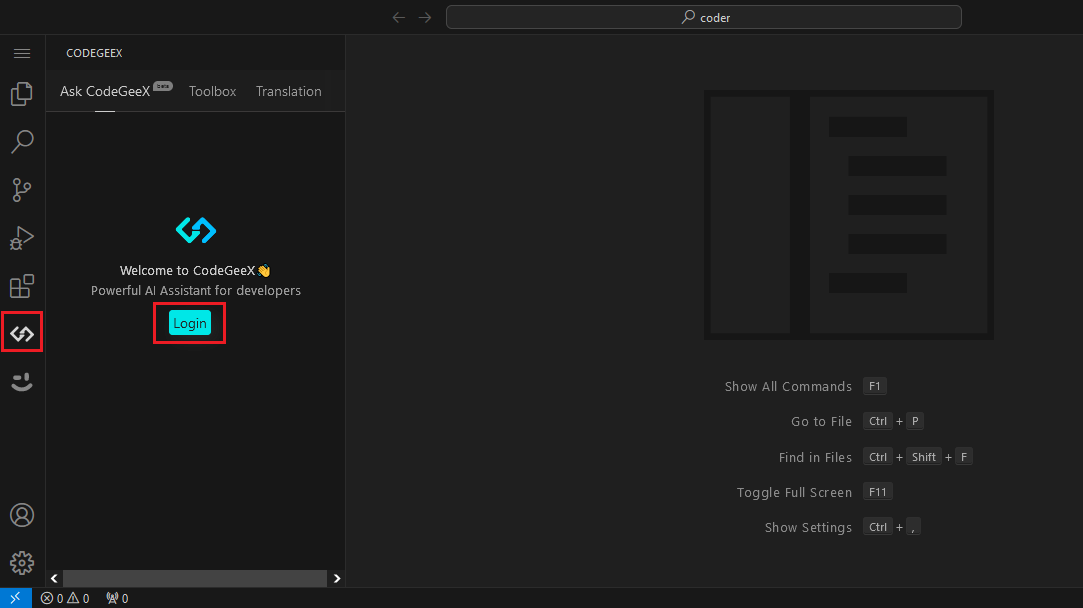
Click on Codegeex icon from the left menu as shown below. It will open login window. Click on Login.
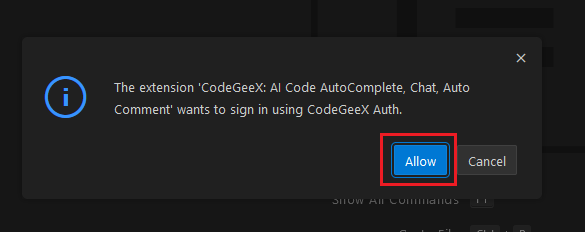
Click on Allow.
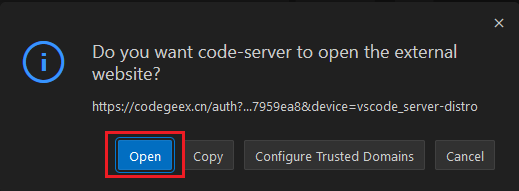
It will ask to open the Codegeex link in browser. Click on Open.
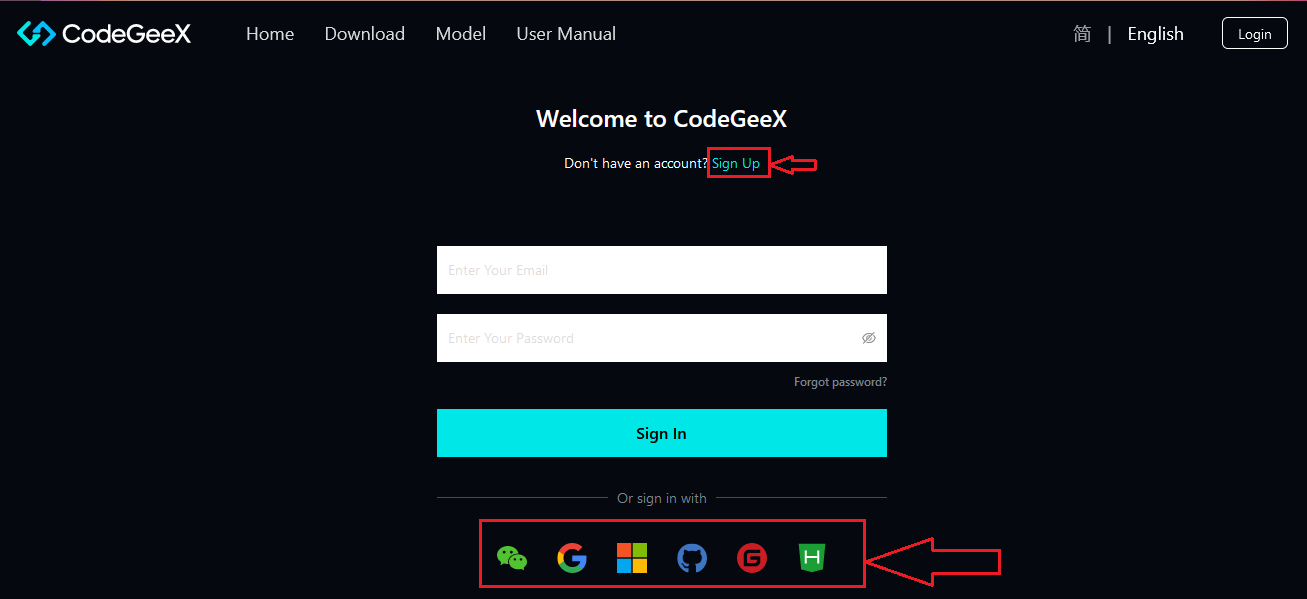
On the Codegeex authentication page, click on Signup or you can login with the options given on this page as shown below.
Once you are successfully logged in to the Codegeeks, go back to Code server page. You should see Codegeex Welcome page.
Note: If you don’t see the Welcome screen, please refresh the page.
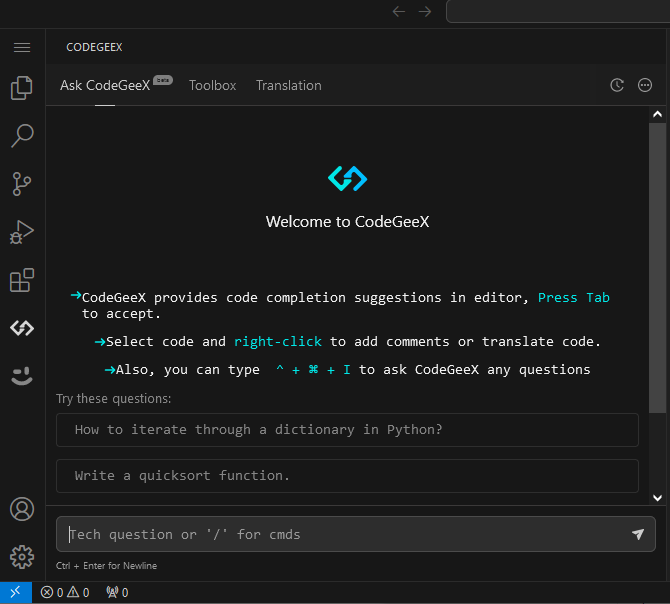
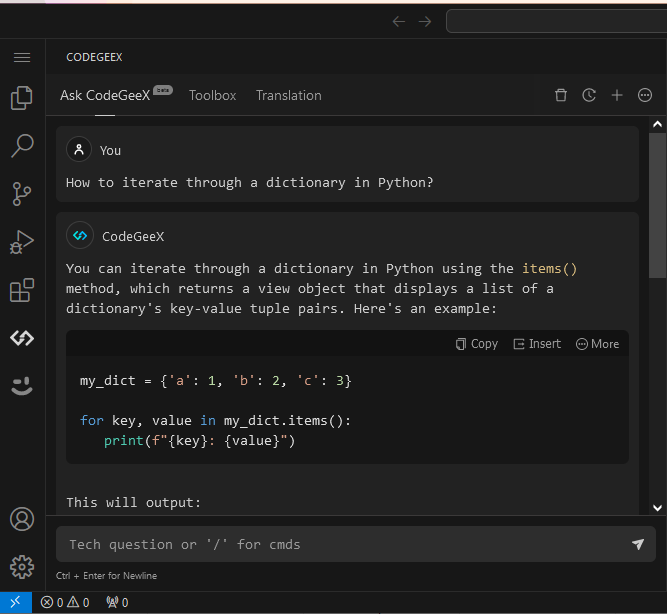
Enjoy various Codegeex features like Code Generation and Completion, Code Translation, Comment Generation, AI Chatbot and more from the comfort of your Code Server window.
For more details on how to use Codegeex please refer to Codegeex official Documentation
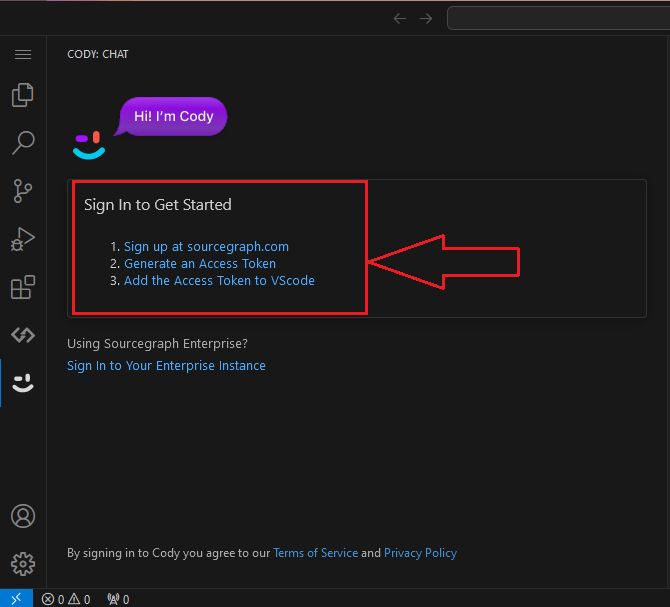
Click on Cody icon from the left menu as shown below. It will open the instruction window. Click on Signup at sourcegraph.com option. Click on Open.
It will take you to the Signup page on sourcegraph website.
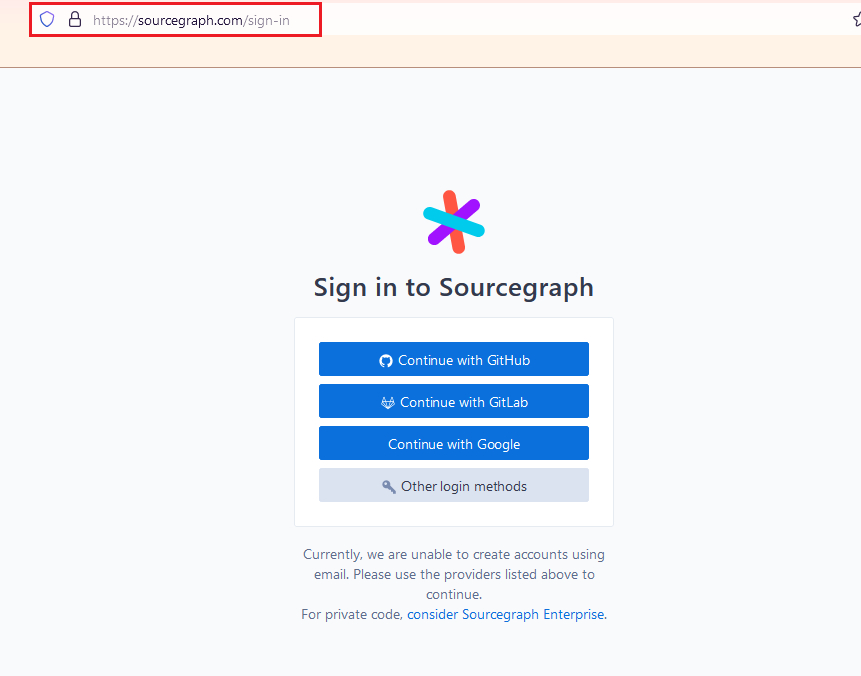
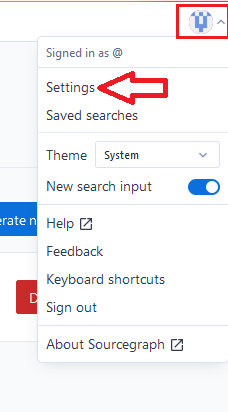
Signup with your prefered option. Once successfully logged in to sourcegraph , click on Settings option available under your profile menu on top right corner.
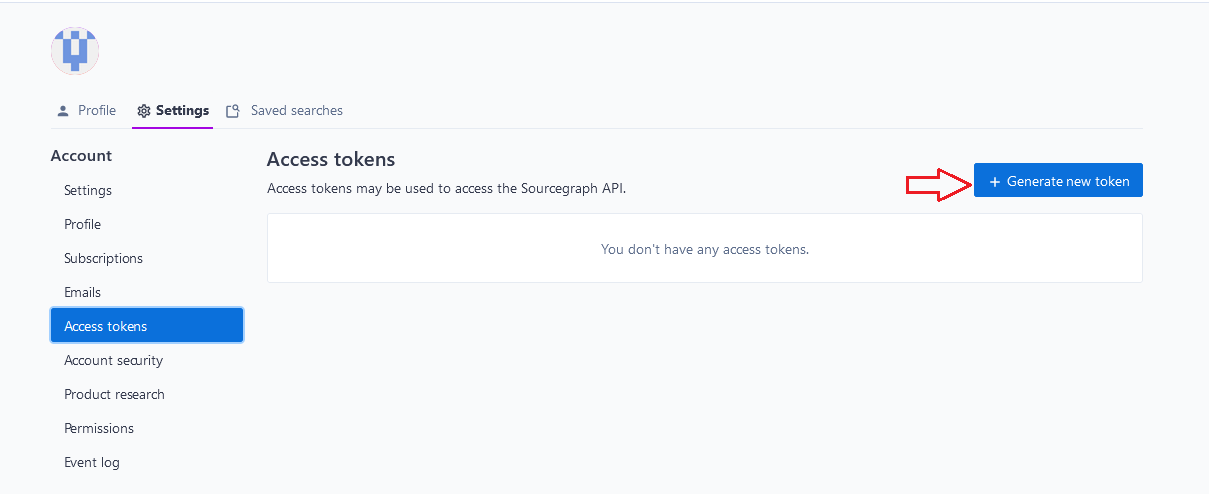
On the Settings page, click on Access Tokens option from left menu and select Generate New Token as shown below.
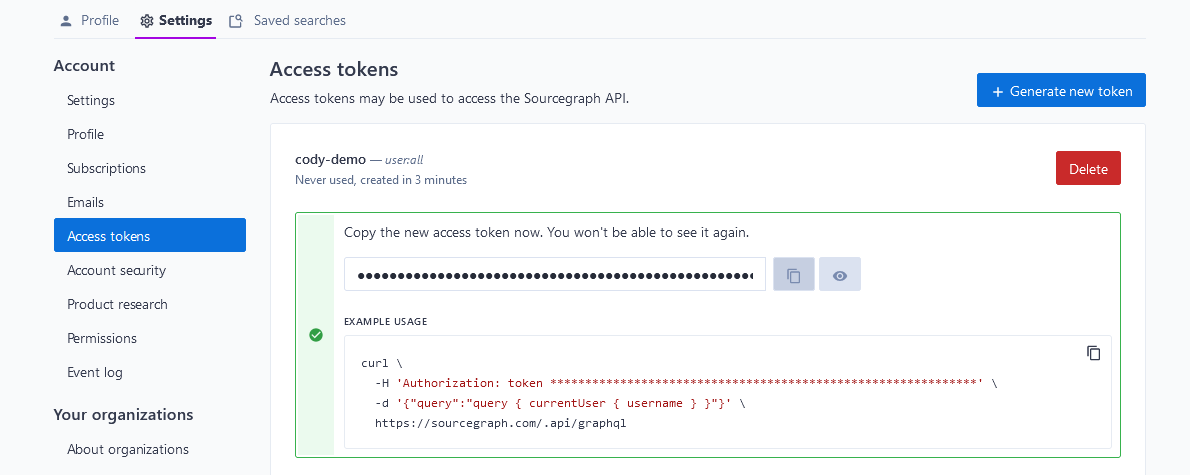
Follow the instructions and generate the new token. Once ready, copy the token from this page.
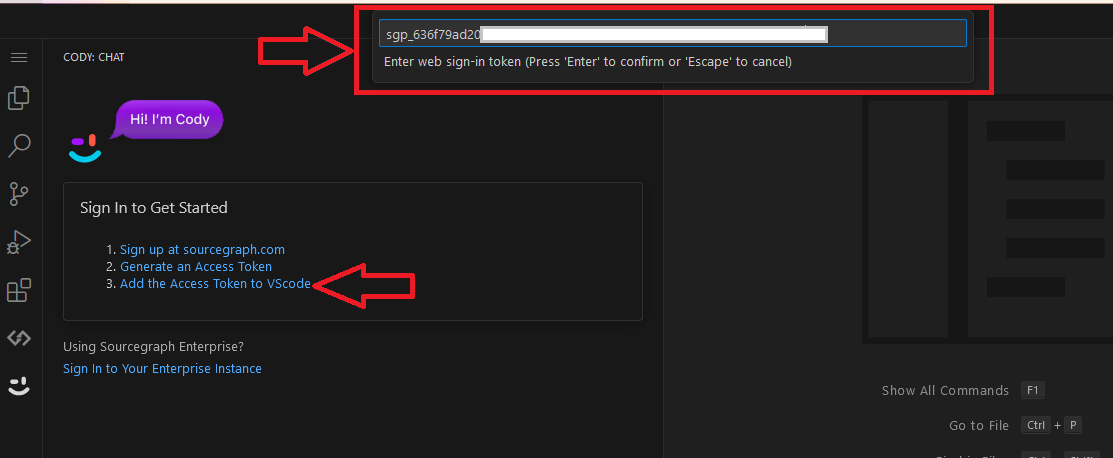
Go back to Code server window and click on Add the Access Token to VSCode option. Paste the token in the top bar and Hit Enter as shown in below screenshot.
Now you should see Cody welcome screen.
Note: If you don’t see the Welcome screen, please refresh the page.
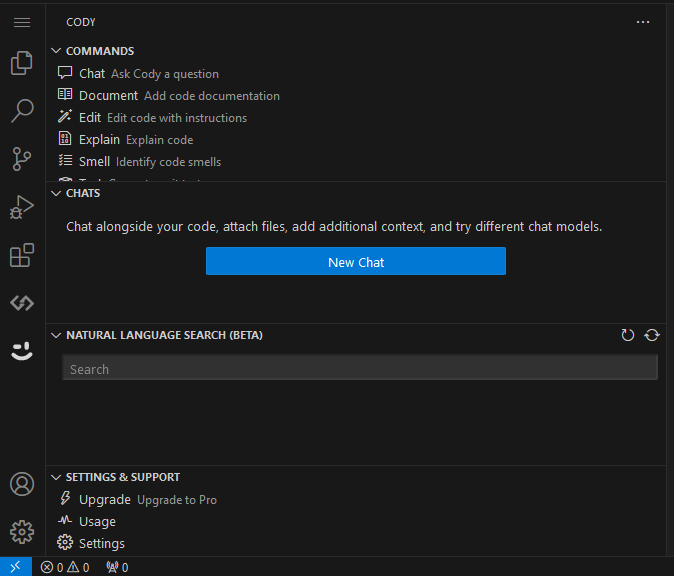
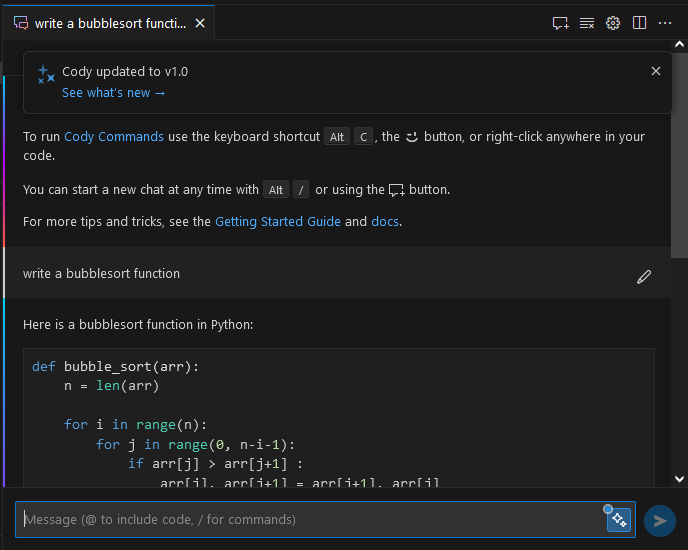
Start using various features of Cody ranging from autocomplete, AI chat, Commands, Debug code etc, right from your Code Server Window .
For more details on how to use Cody please visit Cody official Documentation