Below are the steps to enable https for your JupyterHub :
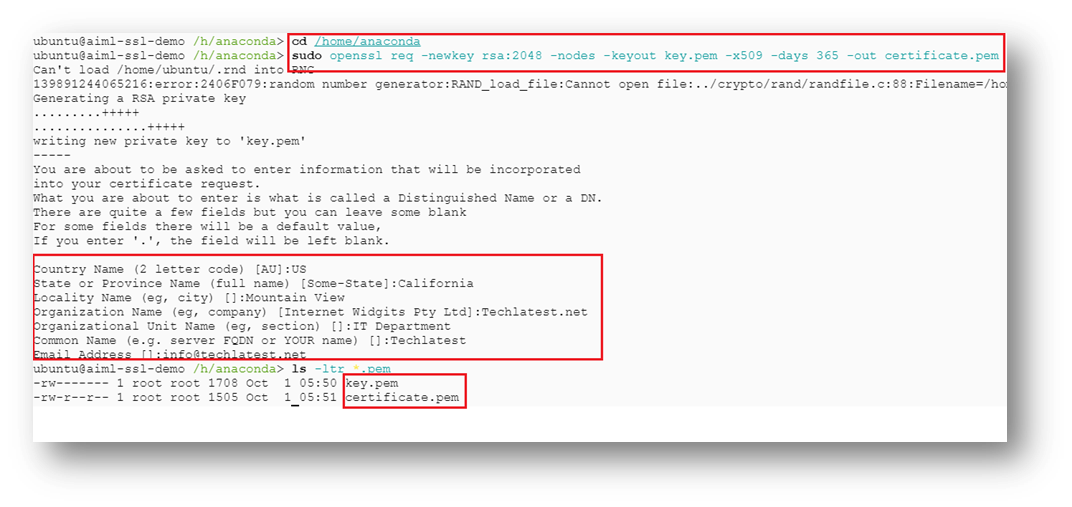
cd /home/anaconda/
Note: Below step is for generating self signed certificate. If you have SSL certificate signed from Certificate Authority, you can skip this step and use your CA signed key and certificate
Generate auto sign certificate by running below command and answering the prompted questions. This will create two files key.pem and certificate.pem .
sudo openssl req -newkey rsa:2048 -nodes -keyout key.pem -x509 -days 365 -out certificate.pem
cp jupyterhub_config.py backup_jupyterhub_config.py
Open /home/anaconda/ in your preferred editor as sudo user.
sudo vim jupyterhub_config.py
Search for “c.JupyterHub.ssl_cert”, uncomment the setting and set it to your ssl certificate as shown below:
c.JupyterHub.ssl_cert = '/home/anaconda/certificate.pem'
Similarly, search for “c.JupyterHub.ssl_key”, uncomment the setting and set it to your ssl key as shown below:
c.JupyterHub.ssl_key = '/home/anaconda/key.pem'
Save the file.
sudo vim /etc/init.d/jupyterhub
change the value for port from 80 to 443 in the last line. Now the last line should look like below. The change is highlighted in red:
source $ANACONDA_HOME/bin/activate pyml ; $ANACONDA_HOME/bin/jupyterhub -f /home/anaconda/jupyterhub_config.py --upgrade-db-- port 443
sudo init 6
For Azure: https://blogs.msdn.microsoft.com/pkirchner/2016/02/02/allow-incoming-web-traffic-to-web-server-in-azure-vm/(the link for enabling port 8080. You should provide 443 as the value and not 8080)
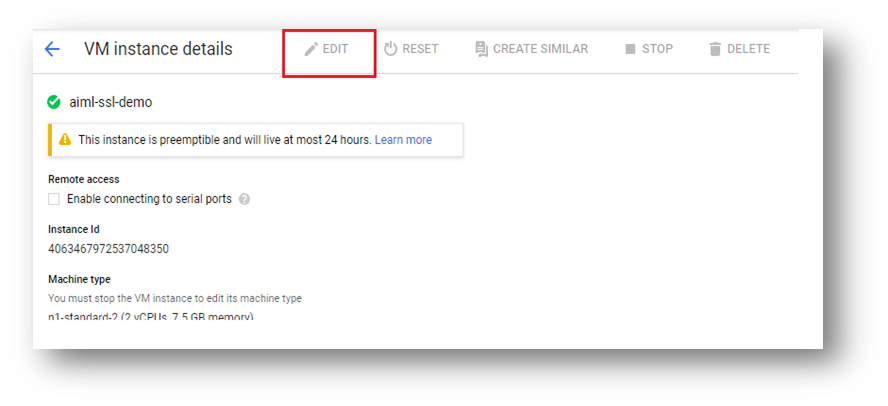
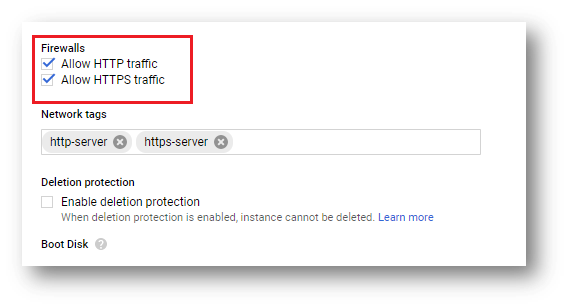
For GCP: Open the VM page from GCP console, click on edit and select “https” option and save as shown below: